In this guide, you will learn how to create and edit lots within your Smart Parking Site. We'll go over the entire creation process from start to finish, as well as the options available to you to fine tune your lots.
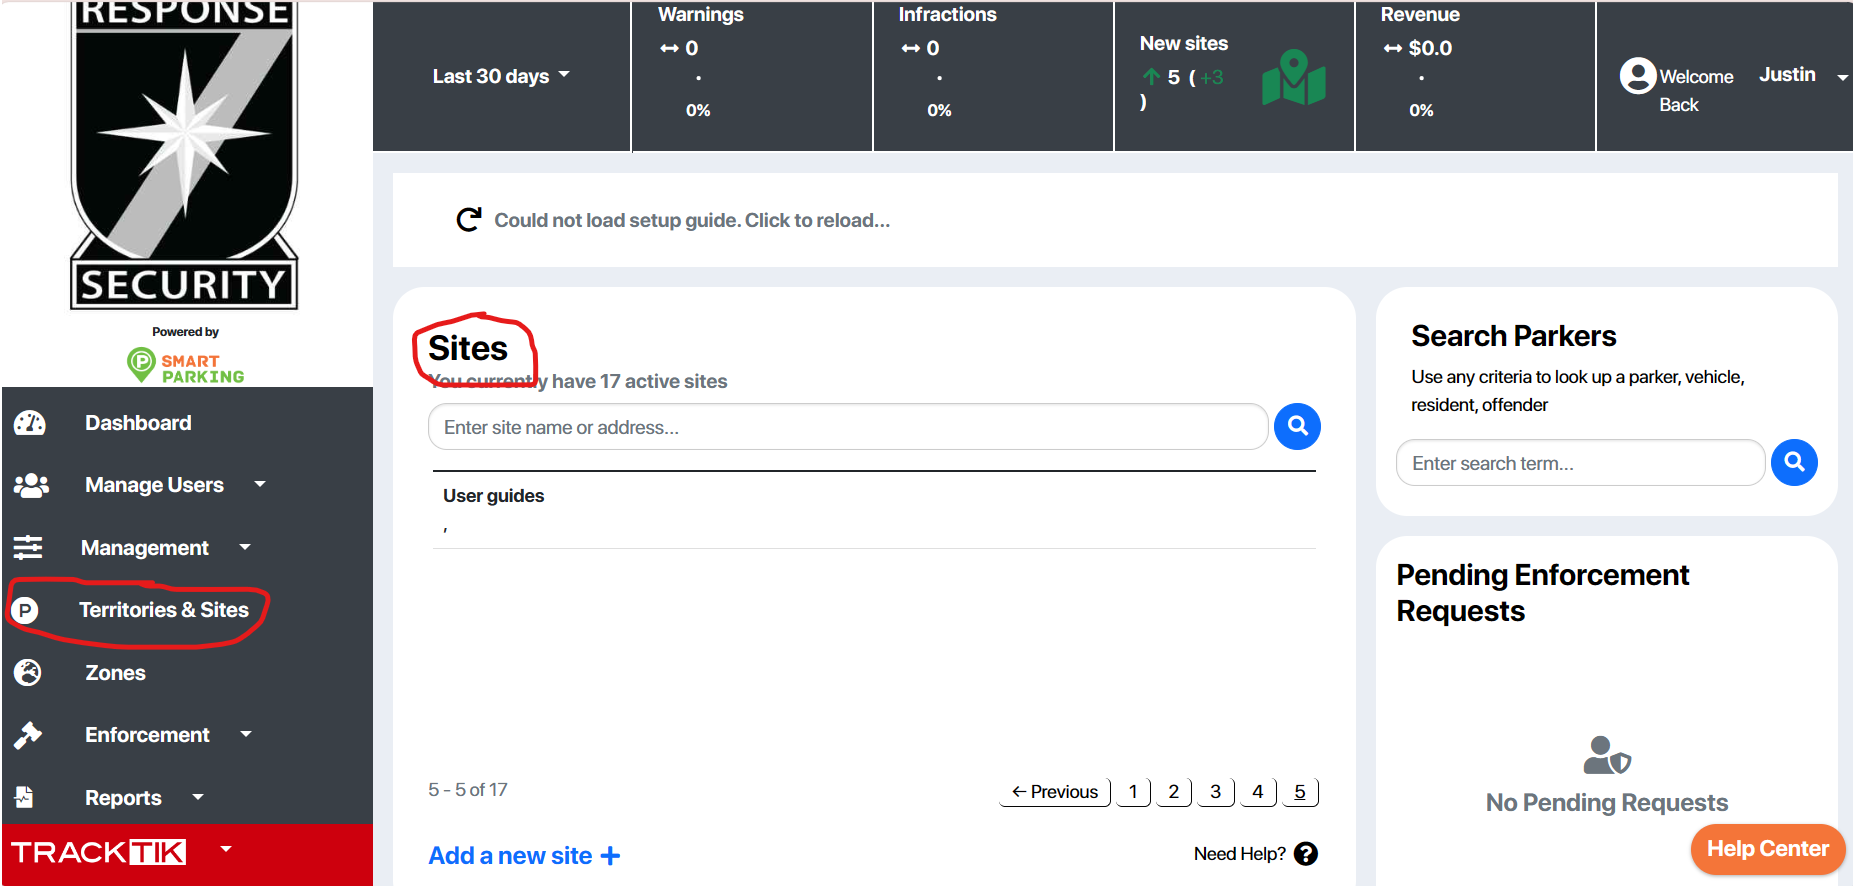
To begin, login to your Smart Parking Apps property manager account, and view the site you wish to create a new lot for either from your dashboard, or the "Territories and Sites" tab on the left side of your screen, indicated by a "P" parking symbol.
Once you've navigated to your site, you will then select either the visitor or monthly parking tabs to create your lot. For this guide, I'll use the visitor parking tab, but note that the two processes are rather similar.
From either tab, you'll now press "Create new visitor/monthly lot" which will bring up a form for you to complete with information about your lot.

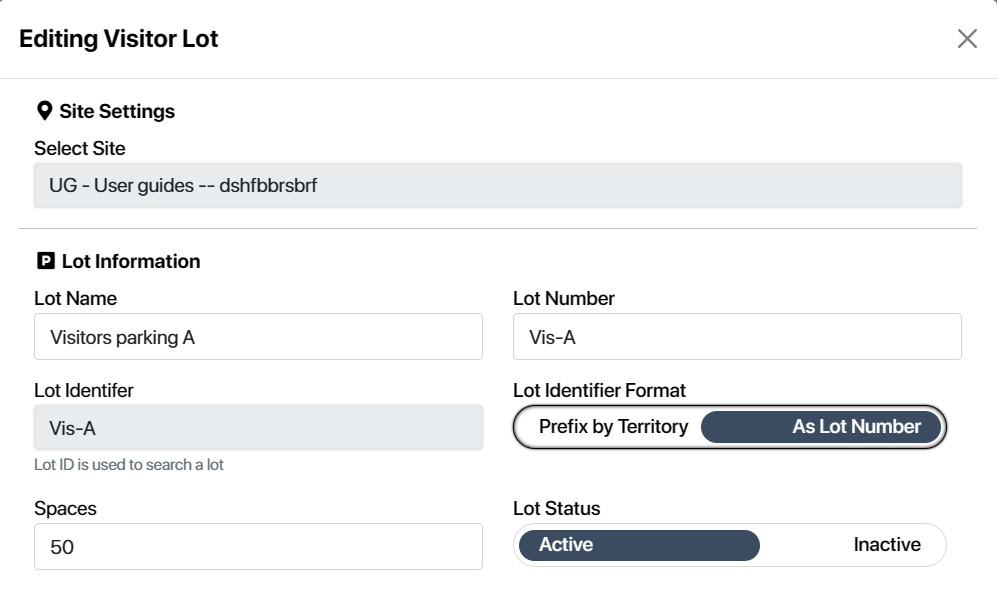
The top section of this form will ask for basic information about your lot to begin.
First, choose a name and lot number. Make sure your lot number is unique to the lot you're creating, otherwise the system won't accept it. It's also important to note that the lot number can be comprised of any alphanumerical character, meaning you're free to include a mix of letters and numbers.
The lot identifier is determined for you based on the lot identifier forma which allows you to choose what your lot identifier will look like, adding the territory's prefix in front of the lot number to create the ID, or simply using the lot number. This can help to distinguish your lot numbers.
This next section will ask you questions about limitations you want to set on how often and for how long your lot can be booked, as well as whether you want to calculate hours by license plate or for each unit.
The image below shows the default settings applied to new lots once you create them. You're free to change these numbers however you wish to customize how often parkers can book your lot.

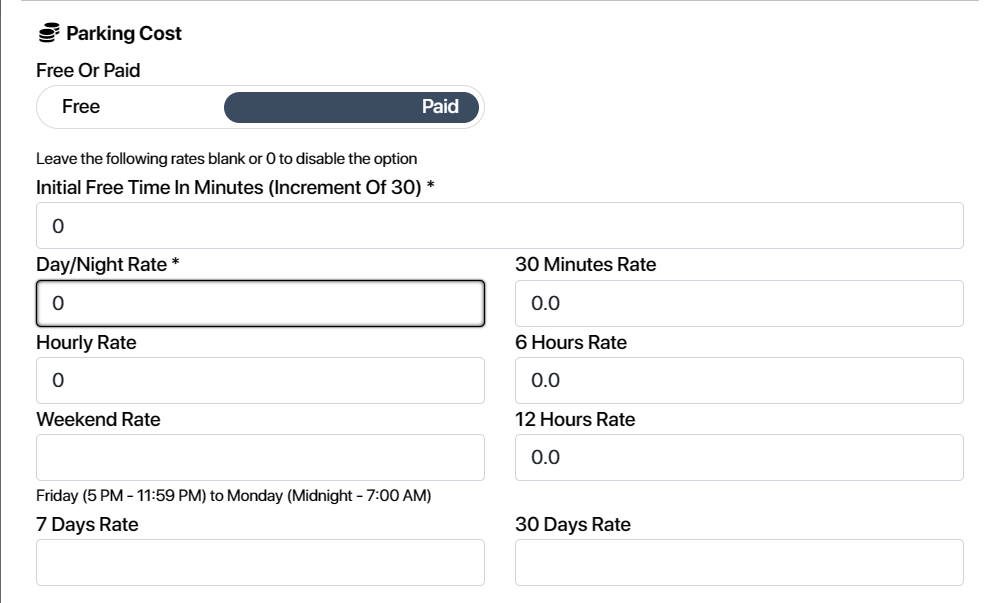
Now, it's time to decide whether you want this lot to be free or paid. Visitor parking lots are set to free by default, so if you plan on keeping your lot free, skip this step. Pressing the "paid" button will bring up pricing options by varying increments of time.
These prices are all set to 0 by default, but you can enter any number into these fields to change the rate for each increment of time respectively. The only required field however, is the day/night rate, so you can leave the rest of these blank if you want, which will disable them as options for parkers.
Next up is booking details. This will help you control who can book spots in this lot and how.
Here, you can decide if you want residents to be able to book this lot, and also enable vehicle registration by unit selection. Doing this will require a visitor to register with a unit they are visiting, and the owner or tenant of the chosen unit will have to accept the registration to confirm access to the lot. If you enable this option, you may further choose to have an access code for the visitor to enter before they can complete the registration of their pass. This can be a general access code you enter manually when you enable this option, or it can be a unit specific access code generated by Smart Parking upon the creation of units at a site. You can view unit specific access codes under the "Parkers and Units" tab within the desired site.
Below this are the reservation options. Reservations are turned off by default, but by enabling them with the "active" button, you can choose how many days in advance a visitor is allowed to reserve their spot, as well as how many spaces out of the total lot are available for advance reservation.
The "Enable Period" dictates when your lot is active. Lots are available all day by default, but by switching your selection to "active" you can set a start and end time for your lot's availability.

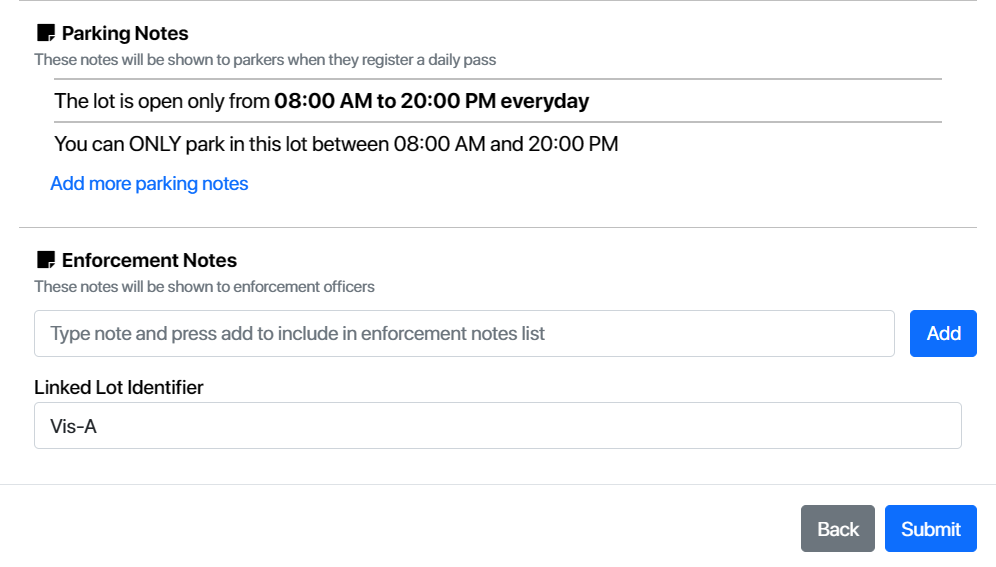
Finally, you are able to set parking and enforcement notes for visitors and enforcement officers respectively to view.
Parking notes are shown to parkers whenever they book a pass and are useful for providing information to people using your lots. You can set parking notes by typing in the text box and pressing "add". By default, the parking notes show whether or not a resident is allowed to use the visitor lot, as well as the active hours of the lot if you didn't set the enabled period to "All Day" in the previous step.
Enforcement notes can be seen by enforcement officers at any time if they are using a Smart Parking integrated enforcement system.
You can also add a lot identifier underneath the enforcement notes which will redirect enforcement officers to the specified lot.
Once this step is completed, you've finished creating your lot! Press the blue "Submit" button to see the lot listed on your site dashboard or under the visitor parking tab!
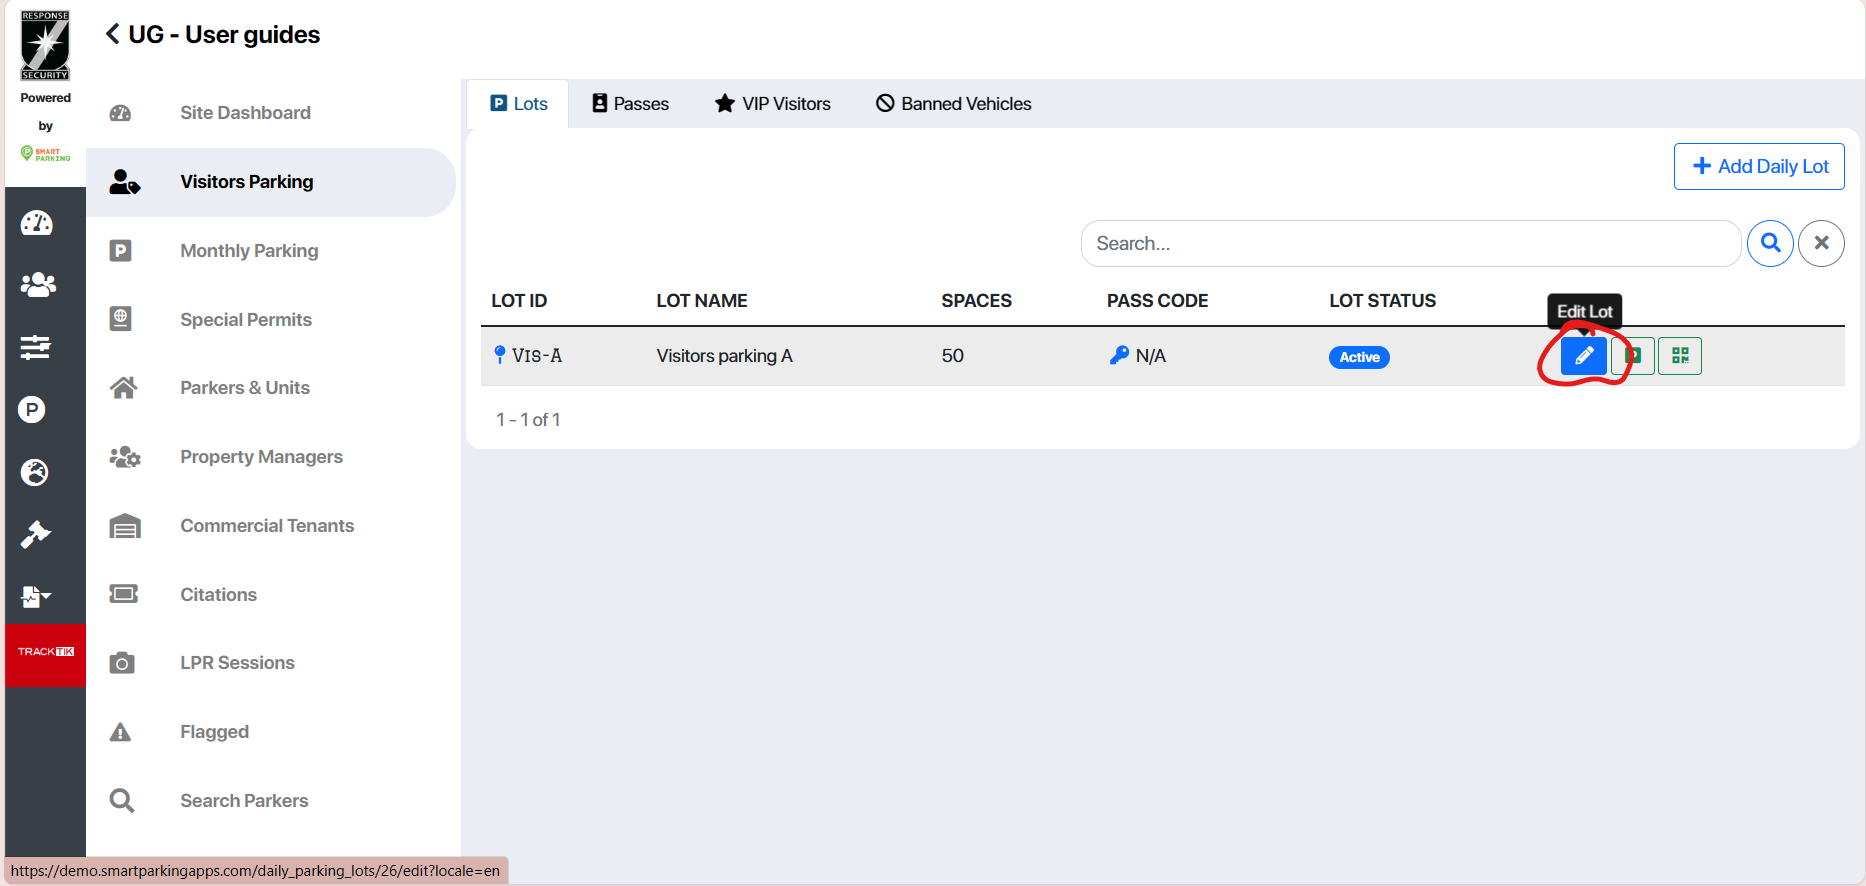
If you've already created your lot and instead want to edit it, follow the same steps at the beginning of this guide and navigate to your visitor parking tab. Then, use the blue pencil icon to bring up the form seen throughout this article and edit any aspect you'd like including price, active hours, notes, and more!