In this guide, you'll learn how to manually issue a visitor pass for a parker. Please note that while this is primarily intended for free lots, you can also issue a pass to a paid lot, but you will need to process the parker's credit card manually.
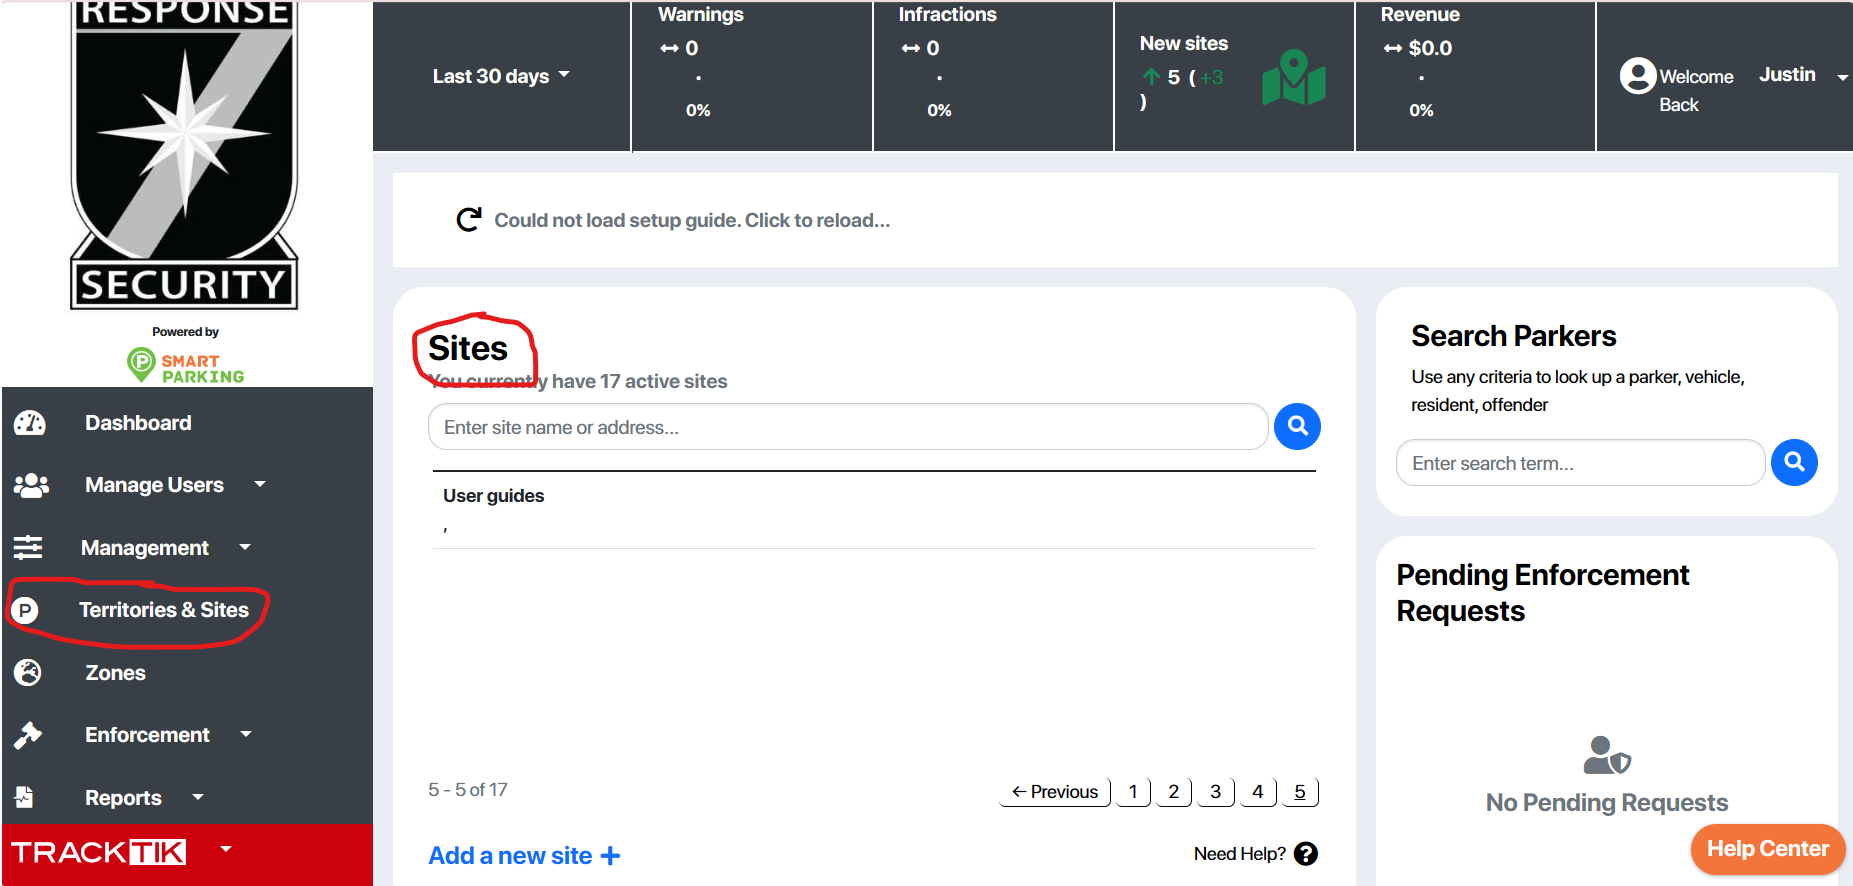
To begin, first navigate to your desired site from either the Dashboard, or the "Territories and Sites" tab on the lefthand side of your screen
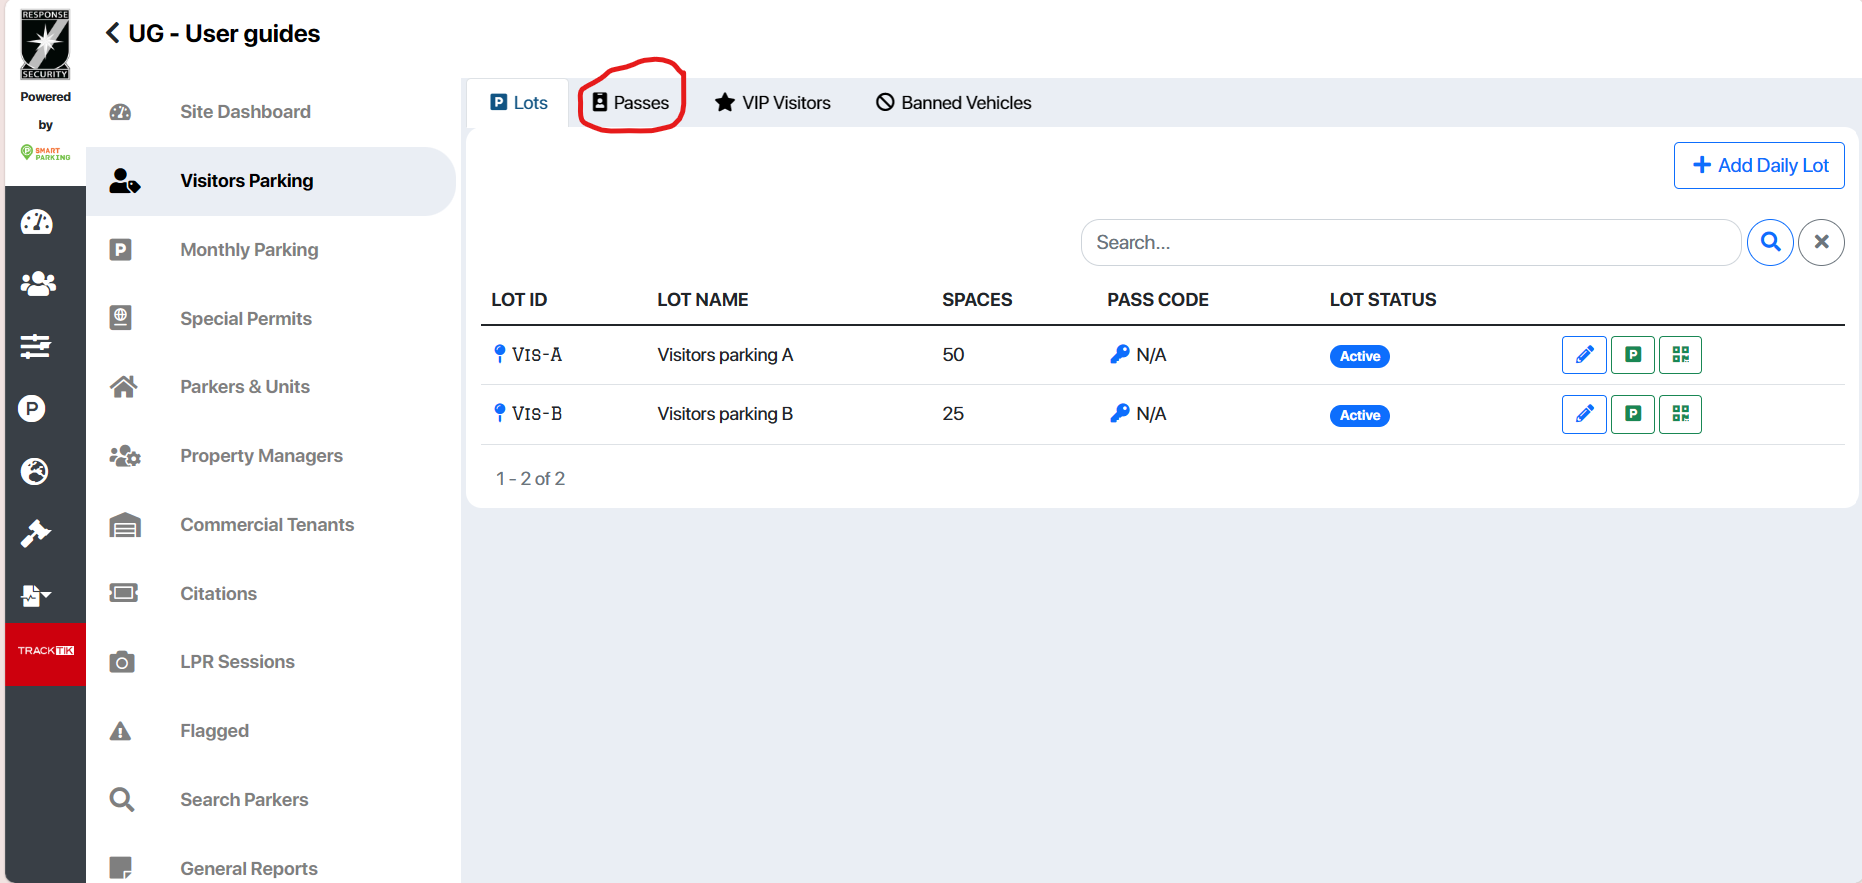
After making your way to the site at which you want to issue a pass, go to the "Visitors Parking" tab, and click "Passes".
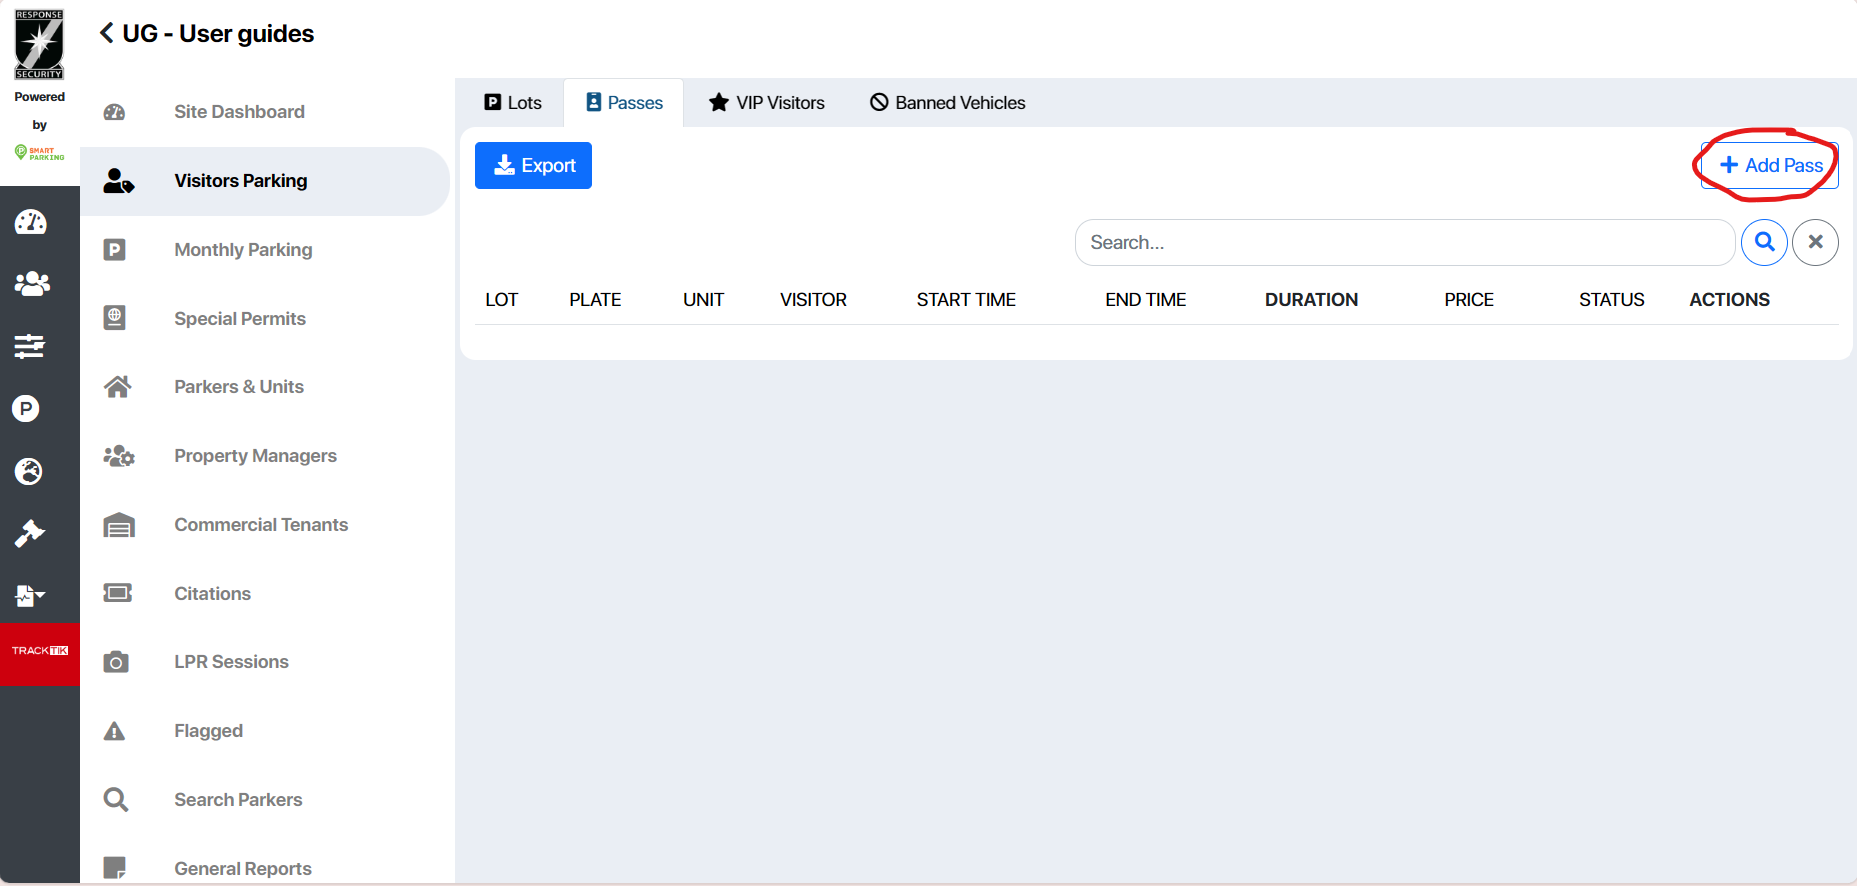
After getting to the "Passes" tab, you'll see any previously issued passes listed in the middle of your screen. To create a new pass, click the "Add Pass" button in the top right corner.
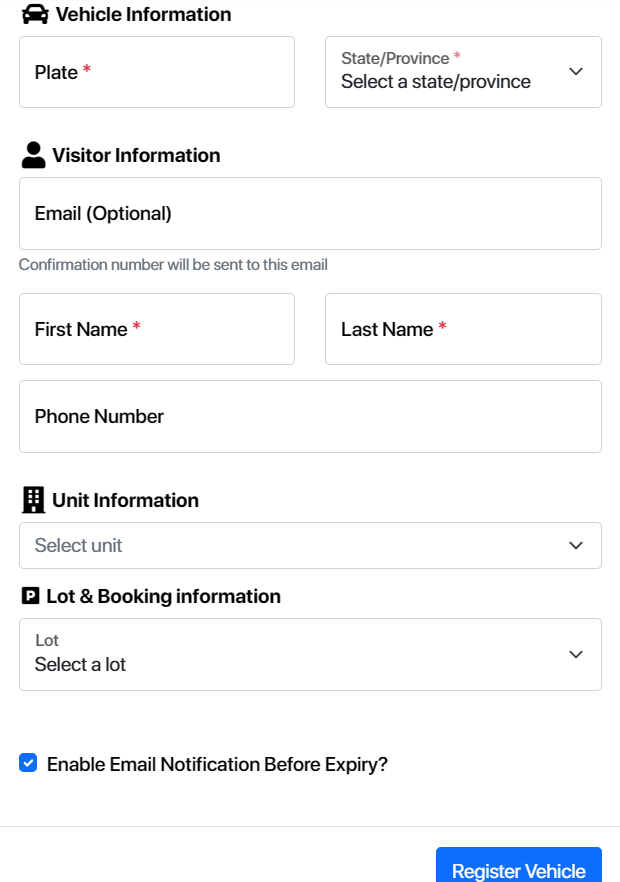
After that, a new visitor pass form should appear. Fill it out with the requested information, and after verifying the details, click register vehicle. Note, Smart Parking also has an option to enable an email notification alerting the parker of when their pass is due to expire. This option is enabled by default but requires you to enter the parker's email which is otherwise an optional entry.
If the lot you issued the pass for is paid, then a Stripe portal will open and you will have to enter the parker's credit card information manually. Once their pass is finalized, the parker will receive an email notification.